Happy (Almost) Halloween, readers!
Fact: Halloween is my favorite holiday.
I’d credit the excellent movies that came out during my childhood. Anyone remember the Disney Channel Original Movie Halloweentown? How about Hocus Pocus? Am I right?
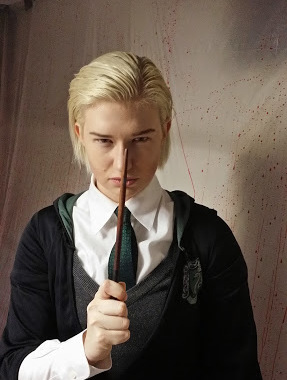
Anyway, I had a Halloween-themed costume party to go to last week, and I had the perfect costume for it: Harry Potter’s nemesis, Draco Malfoy! After all, I already have the short, bleach blonde hair for it. Some people even call me Malfoy on occasion (ya’ll know who you are).
Luckily, I found a child’s size extra large Slytherin robe for two bucks at Goodwill, and Chris was kind enough to lend me a green tie of his. I already had the white oxford shirt, gray vest, and black pants. I wore my black velvet creepers, because I think Draco would dig that sort of shoe.
Still, I was missing something.
What’s a wizard without his wand? I’d say one who is out of luck and likely to steal another wizard’s wand only to have that wand turn out faulty, causing him to cast a memory charm on himself. We couldn’t let that happen! (Remember how I said that I haven’t finished reading the entirety of the Harry Potter series, but that I was working on it? Well it’s true! I actually read all of Chamber of Secrets the same day as the party. It really helped me get into character. J.K. Rowling is a brilliant woman.)
I scoured local costume shops for a Draco wand, but they all only carried Harry’s wand. This wouldn’t do, because Harry and Draco’s wands look very different. Harry’s wand appears knotted and marled, while Draco’s is more sleek. I found Draco wands on the internet that ranged anywhere between four and fifty dollars, but I didn’t have enough time to wait on any of them to ship to my house, nor do I have the funds to pay overnight shipping.
So what’s a wand-less girl boy to do?
After a few hours of brainstorming and overcoming functional fixedness, I found my solution. You got it! I was going to DIY my very own Draco wand.
You can make this wand with household items. I actually already owned all of the craft supplies necessary for the project, and it is relatively quick to make.
So without further ado, I give you the DIY instructions for the costume/cosplay Draco Malfoy Wand:
You’ll Need:
One 14″ Wooden Spoon (Mine came as the largest in a four-pack from Family Dollar)
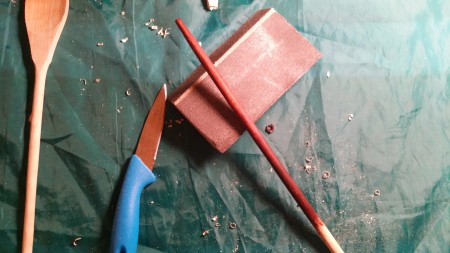
One Sharp Paring Knife
One Cutting Board
One Ruler or Measuring Tape
One Sanding Sponge or Sand Paper
One Small Paint Brush (preferably angled)
Brown Acrylic Paint (Burnt Umber works nicely)
A Black Sharpie or Pencil
Black Acrylic Paint
Newspaper or Dropcloth
An adult if you are under the age of 13
(Unicorn Hair optional for wand core)
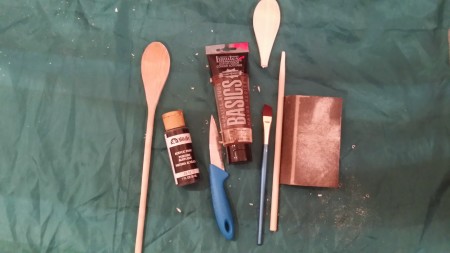
Your Supplies (sharpie, ruler, and cutting board not pictured)
How To:
1. Place your 14″ wooden spoon on the cutting board. Place your non-cutting hand on either end of the spoon firmly and make a ridge at the top of the spoon handle, where where the curvature of the spoon head starts (Draco’s wand is precisely 10″ long, so you can measure this; but if you’re using a 14″ spoon, I’ve already done it for you.) Rotating the spoon a few times, make the ridge all the way around the circumference of the spoon handle as deep as you can, being careful not to put too much pressure on the wood, or it’ll snap down the shaft of the spoon. If this happens, you can glue the piece back on with wood glue or super glue, but you may need to get another spoon if the damage is too great.
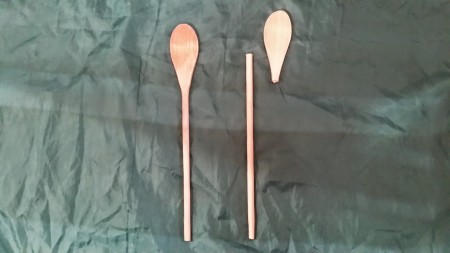
Steps 1 and 2, Beheading (ha!)
2. Completely separate the spoon handle from the spoon head by applying steady pressure with the knife. This step may be easier if you are using a sharper knife than my dollar store one. Discard/recycle the spoon head or save it for another project.
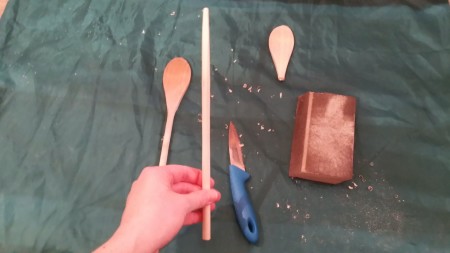
3. This is the trickiest but most important part! Firmly grasp the spoon handle and whittle one end of it with the paring knife starting about two inches from the end. Pretend you are sharpening a pencil the old-school Abe Lincoln way, except you don’t want to sharpen it to a point. We are making a wand, not a vampire stake. You want to achieve the same gradual curve all the way around, just like Draco’s wand. Try to make it as uniform around as possible. making sure to whittle away the opposite side of whatever side you were working on. Don’t cut away too much, or you’ll find your wand disappearing faster than you can say “expelliarumus”. Gradual is key. Really take your time on this part, but don’t worry about perfection. That’s for step 4.

Step 3, Whittling
4. Again, firmly grasping the wand, put down your paring knife and grab your sanding sponge. Sand the end of the wand you just whittled until you achieve a smooth finish. You may sand the entirety of the wand. but focus on the end you whittled the most, as well as right underneath the whittled area. If after sanding you find that there is an area that could be whittled some more, then do, and sand again. Sand both ends of the wand until they are smooth.
Step 4, Sanding (notice the wood dust on the sanding sponge)
5. Now it’s looking a lot more like a wand and a lot less like a spoon handle! Nice! This is the fun part: Wipe the wood dust off of your wand and take out your brown paint and paint most of the wand brown. I used a wet brush and started at the skinnier/whittled end to achieve a wood stain/ombre effect and make it look more like Hawthorn wood. There’s no need to paint the very bottom of the wand brown, because that’s where the black paint is going.
Step 5, Brown Paint
6. If you used acrylic paint, you won’t need to wait long at all to get out your black paint. First, hold your wand like Draco would, letting the base rest in the center of your palm. Note where the top of your index finger hits the wand (for me, this was around 3″), and make a mark with your black sharpie about 1/2″ up from that. You may use a pencil if you’re worried about making a mistake, but if you do, you can just paint over the mistake with brown acrylic paint. Starting at the mark, draw a line all the way around the wand until it meets. This is where the black paint will stop.
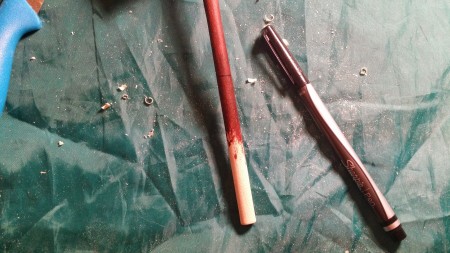
Step 6, Marking
7. Paint the “grip” of your wand black up to the line you made, making sure to use plenty of paint to fill in the wood grain. Wait for the black paint to dry, and voila! Your very own Draco Malfoy costume wand.

Step 7, Black Paint
This wand isn’t an exact replica, as I didn’t bother with the two ridges along the top of the grippy part of the wand, nor did I worry myself with the stylistic angles at the base of the wand. If this bothers you, I imagine you could take some extra time whittling these features into the wand. I’m not at that level of woodwork, but all the more power to ya. You could probably also use some type of air-dry black clay to make the nubbies, but I just didn’t feel like making the trip to the craft store and buying it.

Another option: You could pay for the collector’s replica here. I am not in any way affiliated with this seller.
Well, I hope you enjoyed my tutorial! Have fun waving your wands around pretending to hex people. I know I did.
If you found this tutorial helpful, then please let me know in the comments or share with your friends and family!
Until next week.
Fancifully Yours,
Jess